 |
Scratch Build a Fleet Scale Carrier |
|
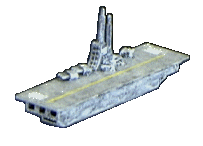
| The following directions are for building a fleet scale (2 inch by 1/2 inch) scifi carrier from basic modelling materials.
You will need:
- sheet styrene, .020" (0.5mm) thick with v-grove .025" (0.64mm) spacing
- 1/8" square tube styrene (3.2mm x 3.2mm)
- .125" x .250" rectangular tube styrene (3.2mm x 6.3mm)
- half round styrene strip, .125" (3.2mm)
- various modelling 'bits' for use as superstructure, engines, guns, etc
- modelling knife, ruler, glue, paint, etc
|
Step One
Cut a 2 1/8" x 1/2" (54mm x 13mm) rectangle from the styrene sheet. This will be the flattop.
Cut three 2" (50mm) long pieces from the square tubing, and glue them together side by side. If
necessary trim or file the ends after glueing so they line up exactly. These will be the launch tubes, and
the top half of the body.
Cut one 1 1/2" (38mm) piece from the rectangular tubing. You may want to modify this length
depending on what 'bit' you've chosen to represent the engine. The tube & engine combined should
be approx 1 3/4" (45mm) long. This will be the bottom half of the body.
Cut a 1/4" (6.3mm) long piece from the half round strip (same length as the rectangular tubing is
wide). |
 |
|
Step Two
Place the flattop piece groved side down. Glue the section of three square tubes onto it,
centered.
Glue the half round strip onto one end of the rectangular tube, and the engine piece (whatever
you've chosen) to the other. (I used the front half of a gun turret from a famous companies cruiser
model.) Allow to set.
Glue the bottom piece, centered, onto the top piece. |
 |
|
Step Three
Flip the whole thing over. You now have the basic carrier shape complete. Time to add the extra
'bits' that make it look like a carrier.
Glue the superstructure onto the top deck, centered, against one side. (I used the back upper
quarter of the superstructure of a famous companies cruiser model for this purpose.) Add guns in front
of, and behind, the superstructure. Add whatever 'bits' you think will nicely customize the model.
Cut a hole in the center of the bottom for the stand to fit into. |
 |
|
Step Four
Paint
I first painted the inside of the three square tubes black. To do this I used a pipe cleaner (a long
piece of twisted wire holding fabric threads), dipped it in the paint and ran it through the tubes.
I used the dry brushing technique, so first I primed it with black primer. When dry, I dry brushed it
with a medium grey paint. Then I added the little details such as portholes, engines etc. Painting the
yellow strip was easy thanks to the groves cut into the plastic sheet. The numbers are decals for ww2
tank models.
The last thing I did was push some putty down the square tubes to block them, so that someone
looking down the tubes wouldn't be able to see out the other end. |
|
| Click on the below thumbnails to see larger versions |
 |
 |
 |
 |
 |
|
 |
| You may have noticed, the bottom front of my carrier has small silver points instead of a smooth curve. This is because I
wanted a slightly different carrier, one designed as a nasty surprise for those enemy heavy cruisers that like to stand off at
9 inches and gradually pound you to bits while your fighters are engaged elsewhere. I found a plastic piece that fit the end
of the rectangular tube perfectly, and I use it for a missile pack battery. So my carriers trade in 4 secondary battery points
for a little extra striking power. I use these carriers with my starblazer ships, so the fact they look like a ww2 carriers makes
them fit right in. |
 |